Showing posts with label Pie. Show all posts

Wednesday, April 10, 2024

Mini Fruit Galettes ミニフルーツガッレト

We had an excess of strawberries which were nonetheless pretty good. So how to use them? My wife happened to come across a recipe for “Mini fruit galettes” in the Washington Post. Although the original recipe involved making a crust from scratch, she had some pie dough in the freezer which was a bit old so she decided to take a short cut and use that instead. While this rendition was more than adequate and quite good for a small but not too sweet desert there is room for improvement. Since the dough was fairly old it was a bit dry and kept opening up. (As shown by the little pie on the left in the picture). Also, a bit more strawberry filling would have been helpful.


Ingredients:
Two Pillsbury refrigerated pie crusts   
1/2 cup plain dried breadcrumbs (I used panko)
1/4 cup granulated sugar
1/4 cup cornstarch
2 cups strawberries (or tart pitted cherries and/or peeled, diced peaches as per the original recipe)
2 tablespoons fresh lemon juice
2 tablespoons Grand Marnier, another orange-flavored liqueur (we used Triple Sec) or 1/2 teaspoon almond extract
2 teaspoons cold unsalted butter, each cut into equal pieces
1 large egg
1 tablespoon water
1/8 teaspoon kosher salt
About 1/4 cup sparkling sugar or turbinado sugar, for sprinkling

Directions:
Line a baking sheet with parchment paper.
Cut the dough into two inch round portions using a biscuit cutter. (A slightly larger size might work a bit better). Roll out the dough a bit thinner. Scatter 1 tablespoon of the dried bread crumbs across the center, leaving a margin all around. (In the upper left hand corner of the picture #1, a crust with the crumbs on it is just visible.) (These bread crumbs are extremely important. They soak up any excess juice and make a nice almost jelly like filling.)


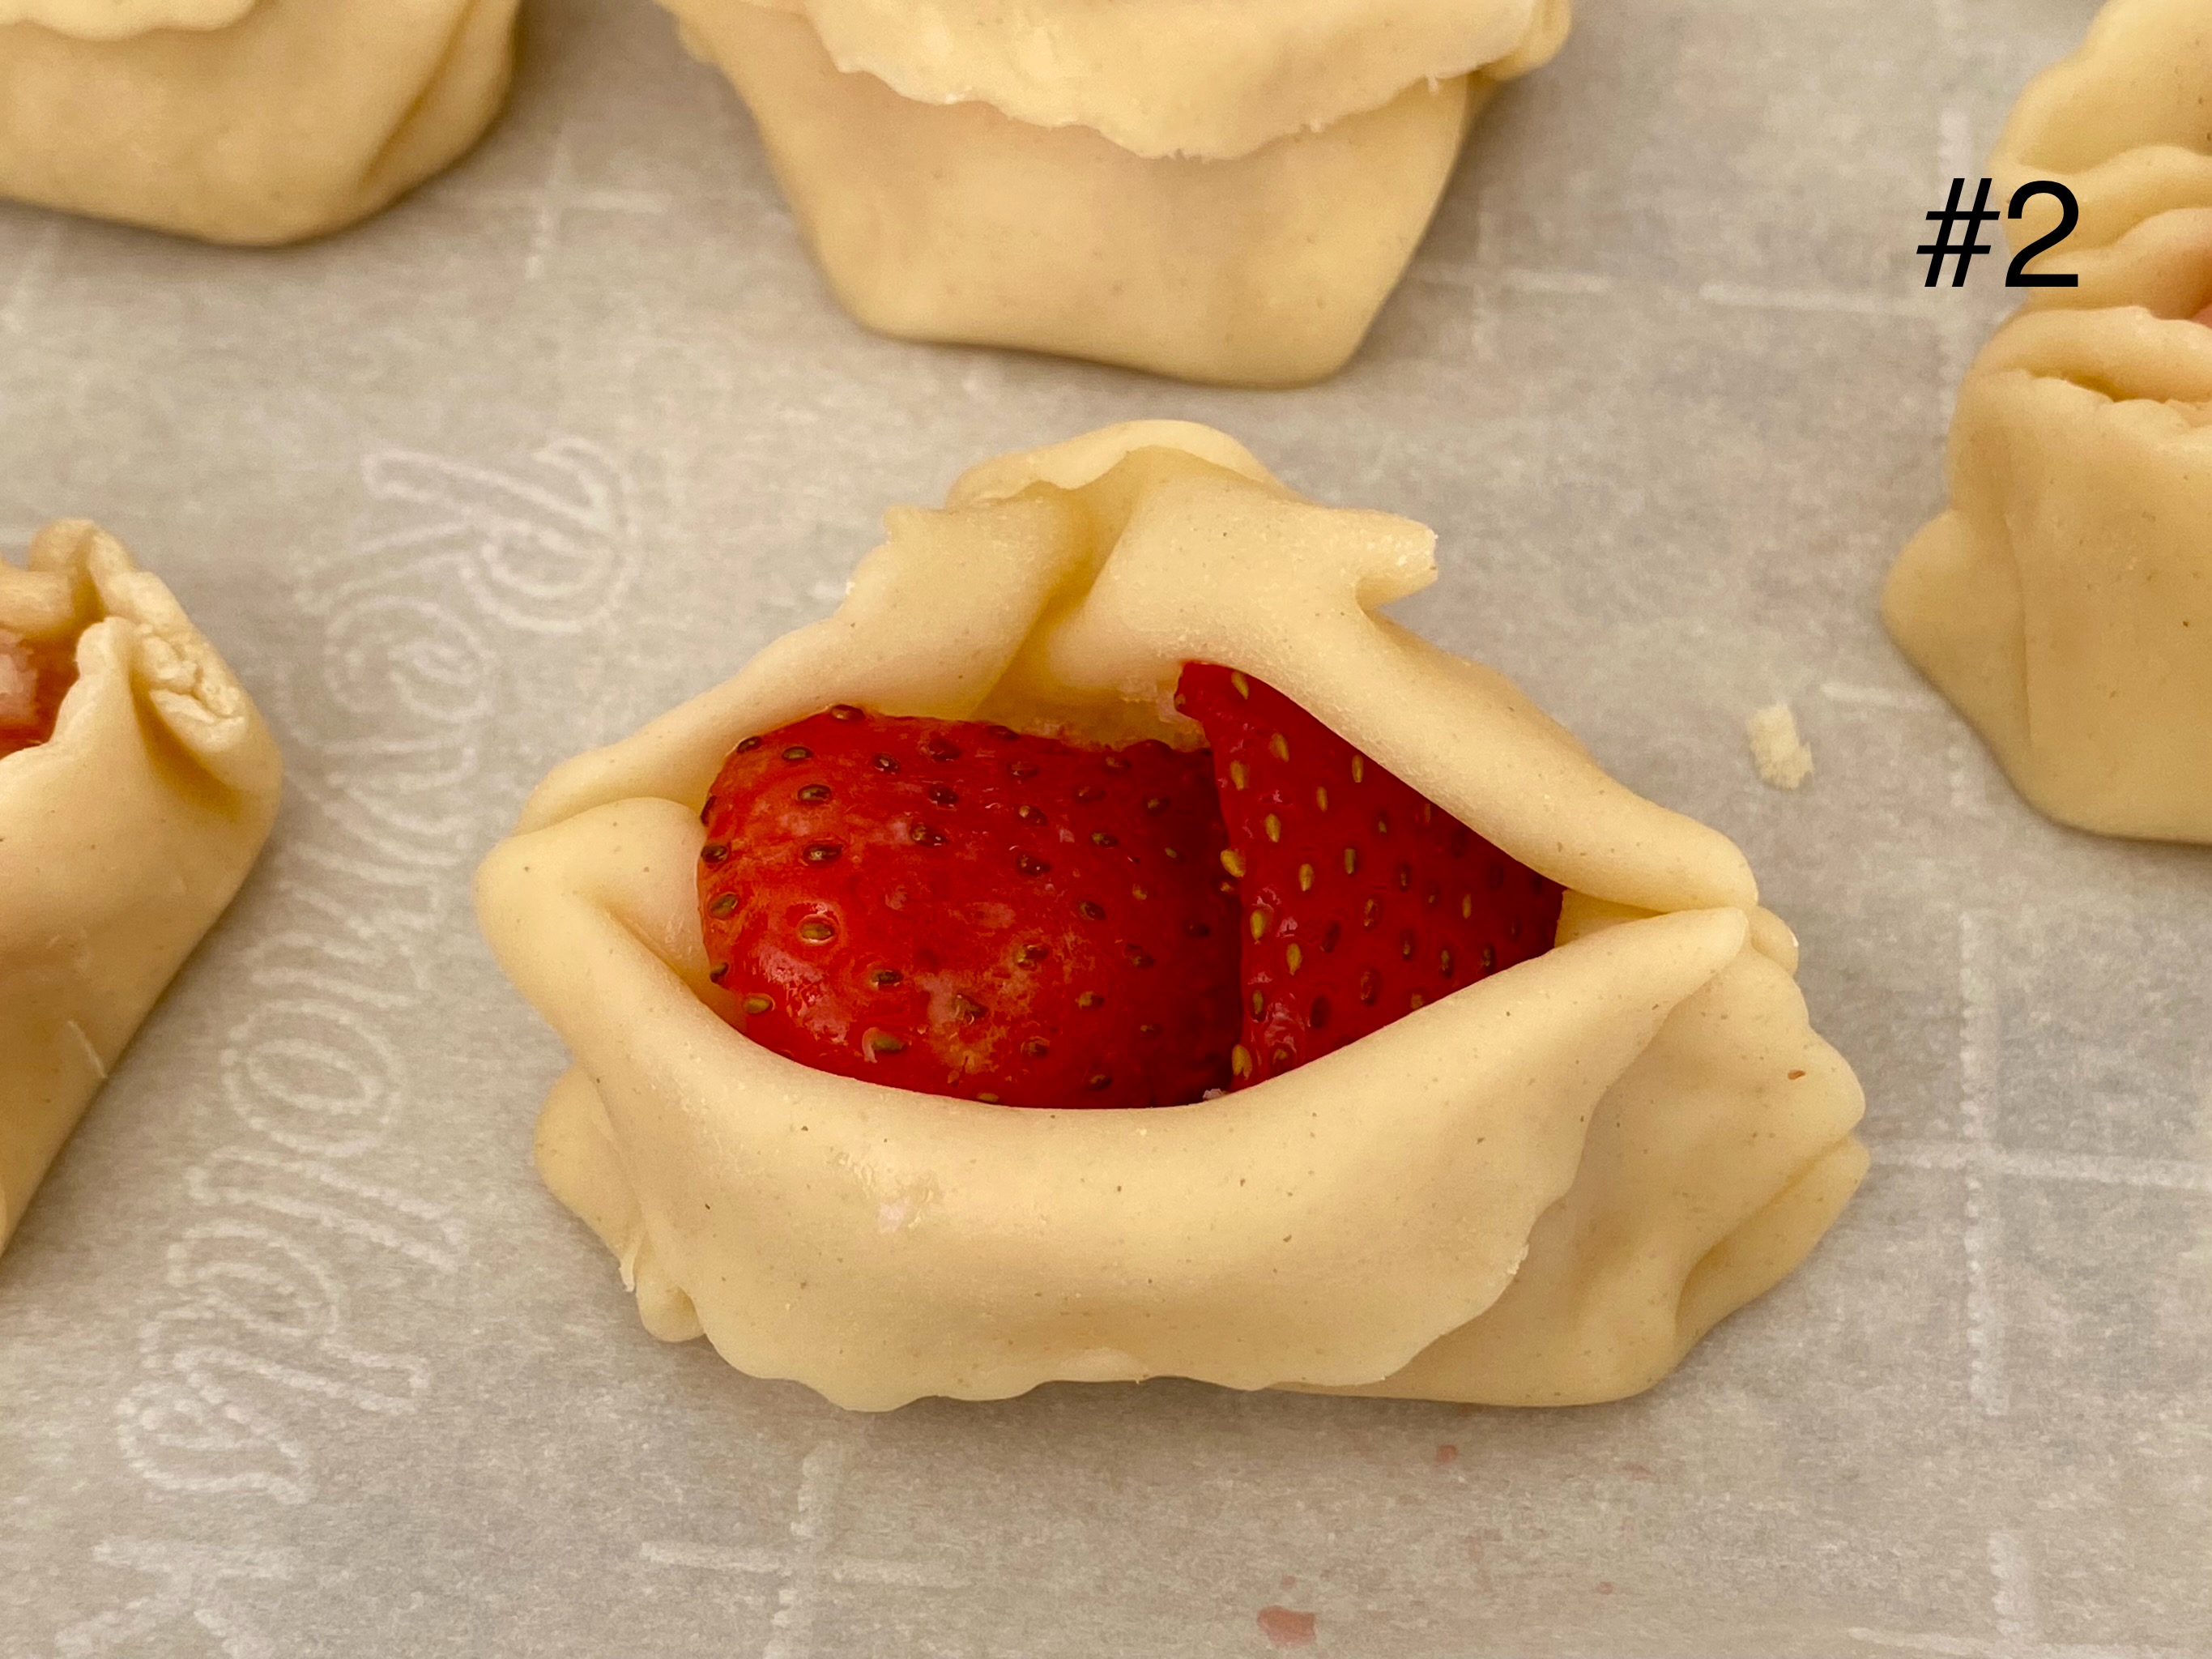
Stir together the granulated sugar and cornstarch in a mixing bowl. Add the fruit, lemon juice and Grand Marnier (Triple Sec) or almond extract; stirring well to coat the fruit. Scoop out a scant spoon full and put in the center of the piece of dough. Working quickly, lift the outside of the dough edge and pull it up and slightly over the filling, leaving the fruit in the center exposed. (This proved more difficult than we expected. Although we moistened the edges of the dough, it kept opening with the filling spilling out. But with some effort we made it work).

Work around each galette, folding the dough over on itself and forming a series of pleats to make a snug package. Use the outside edge of your hands to cup the edges of the galette and gently press the dough into the fruit. Snuggle one small cube of butter into the center opening. Place the galette on the baking sheet. Repeat with the remaining dough rounds, filling and butter.


Freeze them, uncovered, for 30 to 45 minutes, until firm.

Preheat oven to 400 degrees. Lightly beat the egg, water and salt in a small bowl. Brush the folded edges of each galette with the egg wash, then sprinkle them with the sugar. Bake for 20 to 25 minutes, until deeply golden brown with bubbling filling.
Cool for a bit before serving.

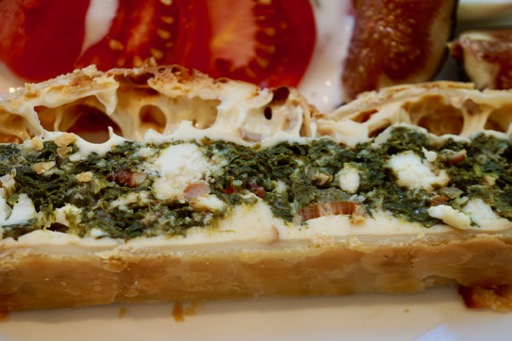
The crispy buttery pie crust was a nice contrast and went well with the strawberry jellly-like filling. The egg wash with the sugar coating caramelized and made a sweet crunch to bite into. The bread crumbs in the center of the dough is a technique to keep in mind for other baked pie goods. Because they soaked up the excess juice the pie crust did not get soggy and remained nicely crispy. My wife said she will make this again with improvements; one of which is the use of dough that is not quite so dry (old).

Wednesday, November 23, 2022

Pumpkin tassie (mini-pie) パンプキンミニパイ

 This is another example of a small bite tassie (pie) my wife made. This time it was a type of pumpkin pie (in keeping with the Thanksgiving holiday season) and  more of a dessert than an appetizer. She served this two ways. One was topped with cream cheese and toasted (grilled) (left) and the other as is. The pumpkin filling has all the seasoning of pumpkin pie, so this tasted like one bite pumpkin pie. The cream cheese butter crust added a nice crunch. The browned cream cheese topping definitely made it better.


Ingredients: (makes 24)
For crust:
8 Tbs. Butter
80 g Cream cheese
140 g AP flour

For the filling:
2 large eggs
1 cup brown sugar
1 cup pumpkin puree
2 Tbs. Evaporated milk
1 tsp. Cinnamon
1 tsp. Ginger
1/2 tsp nutmeg
1/4 tsp salt
(2 tsp. Of pumpkin pie spice could also be used instead of the cinnamon, ginger and nutmeg)

For topping
Small slice of cream cheese

Directions:
In a stand mixer with a paddle beat the butter and cream cheese until smooth, about 2 minutes. Stop the mixer and add the flour. On low speed, mix until no streaks remain and the dough starts to come together, about 1 minute. Scrape any stray dough from the sides of the bowl, gather into a ball and flatten into a smooth rectangle or disc.

Cut the cold dough into 24 equal pieces, (I did this by dividing the total weight of the dough by 24 to get the gram weight of each piece. That way they would at least be somewhat equal). Using your fingers, evenly press each piece into the bottom and up the sides of the 24 mini muffin cups, making sure there are no holes. I found the best way to get the dough into the cups was to make a small ball out of the dough, put it in the cup then using my thumb push down on the center of the ball forcing a depression in the center and the displaced dough up the sides of the cup. Then using my thumb and fingers spread the dough evenly up the sides of the cup. (First picture below). There is enough butter in the dough that the cups don’t need to be greased or paper cups don’t have to be used. Refrigerate for at least 1 hour. (I refrigerated over night).


For the filling if using canned pumpkin cook it in a sauce pan for several minutes until it turns darker in color and pulls away from the sides. (This helps remove the canned taste, moisture and concentrates the flavor). Let the pumpkin cool than mix in all the remaining ingredients together. It will look like the picture below. Scoop the filling into the prepared crust cups. (I used the smallest ice cream scoop). Cook in a 350 degree oven for 15 to 20 minutes until the crusts are golden brown and the filling has set. 


These are wonderful mini pumpkin pies which bear all the flavor of the fall season. They are good just eaten plain or topped with a small piece of cream cheese. They are best when toaster-ovened until the cream cheese becomes soft and develops caramelized spots.


Monday, July 4, 2022

Apple tassie (mini pie) ミニアップルパイ

This is another version of the mini pie called “tassie”. This time my wife made it with apples so it is a mini apple pie. As with the “buttermilk mini pie”, this is a small dessert which is perfect for us. It is traditional apple and cinnamon flavors.


As usual, I will ask my wife to take over.


Ingredients: (makes 24)
For the crust
8 tablespoons (4 ounces/120 grams) unsalted butter, softened, but still cool to the touch
3 ounces (80 grams) cream cheese, softened, but still cool to the touch
1 cup plus 2 tablespoon (140 grams) all-purpose flour

For the topping:
1/2 cup (62.g) AP flour
6 Tbs. brown sugar (1/4 cup + 2 Tbs.)
1/4 tsp. salt
4 Tbs. (60 g) butter

For the filling:
12 oz. (300 g) apple grated
1/2 cup (110 g) brown sugar
2 Tbs. (30 g) melted butter
2 Tbs. cornstarch
1/2 tsp. cinnamon
1/2 tsp. ginger
1/4 tsp. nutmeg
1/4 tsp. salt

Directions:To make the crust: In the bowl of a stand mixer fitted with the paddle attachment beat together the butter and cream cheese until smooth, about 2 minutes. Stop the mixer and add the flour. On low speed, mix until no streaks remain and the dough starts to come together, about 1 minute. Scrape any stray dough from the sides of the bowl, gather into a ball and flatten into a smooth rectangle or disc. Cover tightly and refrigerate for 1 hour.

Cut the cold dough into 24 equal pieces, (I did this by dividing the total weight of the dough by 24 to get the gram weight of each piece. That way they would at least be somewhat equal). Using your fingers, evenly press each piece into the bottom and up the sides of the 24 mini muffin cups, making sure there are no holes. (This part was a bit tricky I found the best way was to make a small ball out of the dough, put it in the cup then using my thumb push down on the center of the ball forcing a depression in the center and the displaced dough up the sides of the cup.) There is enough butter in the recipe that the papers were not necessary. Refrigerate uncovered, while making the filling.

To make the topping:
Mix all the ingredients together using your fingers until they form small pea sized clumps. Set aside

To make the filling:
Grate the apple using the large holes of a grater. Add all the other ingredients mixing to distribute them evenly. Add about a tablespoon of the filling to each dough cup filling them about 3/4 full. (I used the smallest ice cream scoop to fill the cups about 3/4 full.) Top each cup with the topping.

Bake in a 350 degree oven for about 15 to 20 minutes until the crumble and crust are golden brown. Cool completely before removing from the pan.

These are wonderful little pies. Just the right amount for a sweet mouthful after a meal. Just perfect for us. The filling became almost like a thick jam which went very nicely with the crunch of the topping.

Saturday, December 11, 2021

Buttermilk mini pie (Tassie) バターミルクミニパイ

While my wife was browsing the Washington Post, she found several small pie (tassie) recipes for the holidays. One was called "Buttermilk chess tassie". We are not sure of the origin of "chess" but it is reportedly a classic southern pie. "Tassie" is not a word we were familiar with but it means a small pie or tart and reportedly originated from the Scottish word "tass" meaning a small goblet. In any case we will call this "Buttermilk Mini Pie". This is perfect for us since it uses buttermilk (of which we have an abundant supply since my wife started making it) and it is small. A perfect single sweet bite as a dessert.


The below was C&P (cut and paste) from WP recipe.

Ingredients:
For the crust
4 tablespoons (2 ounces/60 grams) unsalted butter, softened, but still cool to the touch
1 1/2 ounces (40 grams) cream cheese, softened, but still cool to the touch
1/2 cup plus 1 tablespoon (70 grams) all-purpose flour

For the filling
1/3 cup (65 grams) granulated sugar
3 tablespoons buttermilk
1 large egg, cold
1/2 teaspoon vanilla extract
1/8 teaspoon fine sea salt or table salt
2 tablespoons (30 grams) unsalted butter

Recipe doubled:
For the crust
8 tablespoons (4 ounces/120 grams) unsalted butter, softened, but still cool to the touch
3 ounces (80 grams) cream cheese, softened, but still cool to the touch
1  cup plus 2 tablespoon (140 grams) all-purpose flour

For the filling
2/3 cup (130 grams) granulated sugar
6 tablespoons buttermilk
2 large eggs, cold
1 teaspoon vanilla extract
1/4 teaspoon fine sea salt or table salt
4 tablespoons (60 grams) unsalted butter


Directions:
To make the crust: In the bowl of a stand mixer fitted with the paddle attachment — or, if using a hand mixer, in a large bowl — beat together the butter and cream cheese until smooth, about 2 minutes. Stop the mixer and add the flour. On low speed, mix until no streaks remain and the dough starts to come together, about 1 minute. Scrape any stray dough from the sides of the bowl, gather into a ball and flatten into a smooth rectangle or disc. Cover tightly and refrigerate for 1 hour.

Cut the cold dough into 12 equal pieces, (I did this by dividing the total weight of the dough by 12 to get the gram weight of each piece. That way they would at least be somewhat equal). Using your fingers, evenly press each piece into the bottom and up the sides of 12 mini muffin cups, making sure there are no holes. (This part was a bit tricky because it was hard to get the dough evenly distributed. Rolling the dough into a round does not work well. I found the best way was to make a small ball out of the dough, put it in the cup then using my thumb push down on the center of the ball forcing a depression in the center and the displaced dough up the sides of the cup.) Also, I wasn’t sure how easy it would be to get the little pies out of the cups once cooked so I put half of them in mini-muffin papers and the rest just in the greased cup. Turns out there is enough butter in the recipe that the papers were not necessary. Refrigerate uncovered, while making the filling.

Position a rack in the middle of the oven and preheat to 350 degrees.

Make the filling: In a medium bowl or 1-pint glass measuring cup, whisk together the sugar, buttermilk, egg, vanilla and salt until just combined. In a small skillet over high heat, melt the butter until it foams, 1 to 2 minutes. Continue cooking, stirring occasionally, until it starts to turn brown and smell nutty. Use some of the butter to temper the egg mixture. Then add the rest of the butter and stir until blended.

Retrieve the muffin pan from the refrigerator, and add 1 heaping tablespoon of filling into each dough cup, filling it almost to the top. (I used the smallest ice cream scoop).

Bake for 15 to 20 minutes, or until the crust is golden brown and the filling is set.

Transfer the pan to a wire rack and let cool completely before removing the tassies.
In any case, this was sweet smooth with some tang from the buttermilk. The browned butter gives it a rich nuttiness. I am not a dessert eater but I had no trouble “choking” this down.

Friday, June 23, 2017

Spinach cheese loaf ほうれん草とチーズのローフ

This is another one of my wife's baking projects. She likes basically anything made with pie dough; mini pies and cheese pockets you name it. She was inspired to make this spinach cheese loaf after reading a recipe in one of the "freebee" promotion cooking magazine we received. She made substantial changes to the recipe and "inspired by" rather than "followed" recipe is appropriate. We had this as a light lunch on the weekend. I made a quick cucumber and tomato salad with our home-made ranch dressing from our favorite "high "octane buttermilk. Since we also made deviled eggs, these are on the plate as well. It was sunny but rather hot day and cold crisp white wine or sparkling wine could have been good but we restrained ourselves.


I also served very sweet ripe mission figs.


You can see the spinach stuffing with bacon bits and bottom and top layers of smoked mozzarella cheese.  She used store-bought pie crust which came out nice and flaky.


This was how it looked before slicing. She made a few cuts on the top crust as vents to let the steam escape.


Ingredients:
One packaged pre-made pie crust thawed
Spinach, two bags, cooked without adding any liquid, excess moisture squeezed and finely chopped.
2 strips of bacon cooked until crispy, oil drained and crumbled.
Two onions diced and carmelized
Feta cheese, half block, crumbled or to taste.
Red pepper flakes to taste
One Egg, beaten.
Smoked mozzarella cheese, thinly sliced, enough to cover the bottom and top of the baking dish.
1 tsp of melted butter.

Directions:
Line the bottom of a small pyrex cooking dish with parchment paper (this makes removal of the loaf much easier).
Roll out one sheet of the store-bought (Pillsbury) pie crust. Put it over the parchment on the bottom dish allowing the excess to hang over the sides (#1).
Line the dough with a layer of smoked mozzarella (#2).
Mix the cooked, chopped spinach, rendered bacon, caramelized onions, feta cheese, beaten egg and red pepper flakes together (#3).
Pour mixture over crust in dish (#4). Cover with another layer of smoked mozzarella. Fold the excess dough hanging over the side of the dish on top the the spinach mixture (#5). Cut vent holes in the top crust and brush with melted butter.
Cook in a 425 oven for 45 to 50 minutes or until the crust is nicely browned (#6). Let it cool completely before attempting to slice.


When she put the loaf in the oven, she was a bit distraught because it looked like the moisture was seeping out to the bottom crust, She thought the bottom crust wouldn't get crispy/flaky. But it turned out to be an optical illusion and everything came out just fine.  This was very nice "all-in-one" lunch. You get you starch, vegetables, and protein all in, in one slice.